Which stair profiles are there and what are the differences?
Have you been looking on the internet for the right product to choose the best anti-slip strip for your stairs, but have you not found it yet? Thank you for visiting our blog as well. Various options are conceivable in stair profiles. I would like to explain the 3 differences in stair profiles to you here, so that you can make the best choice that is suitable for your stairs. Stair profiles can be divided into: angle profiles, milling profiles, glue profiles.
Angle profile
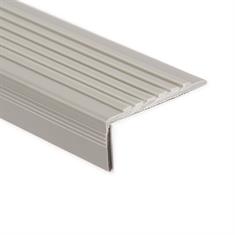
Stair profiles are usually referred to as corner profiles, an aluminum angle that you can buy at any hardware store and that you screw to the edge of your stairs to protect them against wear of the material (usually wood) and where you can keep the stair tread an anti-slip due to the ridges in this profile. The stair profile, also called stair side, is available in many versions. This is not really elegant and attractive in terms of appearance for your stairs in the house. This stair profile is usually used for stairs that are frequently used with shoes. You often see this profile used in factories and shops and in outdoor applications. The stair tread in the house is protected against wear of the material with this profile, but it does not look very nice in your interior. It also feels very uncomfortable when walking without shoes, the stair profile as an angle model is really designed for frequent use of the stairs with shoes on. This profile is therefore less suitable for traditional residential staircases.

Router profile
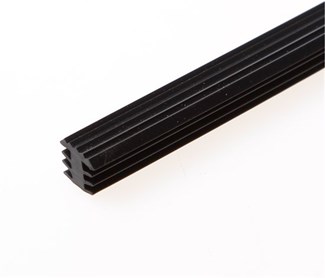
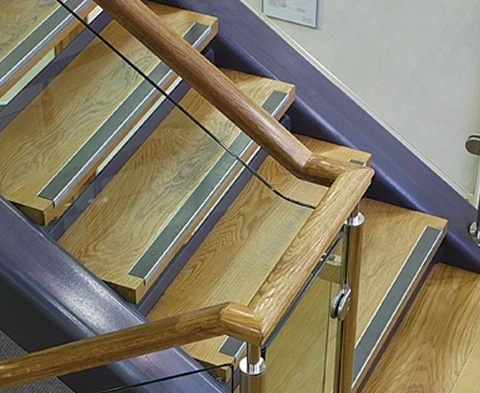
I suspect you are looking for a stair profile for your residential staircase. Maybe because you want to give the stairs a new look, a paint job, or simply because you think the stairs are too slippery. You can also opt for a milling profile. How does a milled stair profile work? A groove is made in each stair step, approximately 1cm wide and 1cm deep, into which a plastic rubber strip is clamped. The recessed profile extends approximately 2 mm above the step, also has grooves and therefore provides good anti-slip. Nowadays, the stair maker usually makes this groove directly in the stairs, so that it continues in a milling profile over the entire length of the stair step. If your staircase does not have such a groove, it must be made in it. There are companies that do this, but if you are handy you can also do this yourself. Keep in mind that you cannot get all the way into the corner, you will then have to hold the strip back about 10 cm from the side. The result is of course very chic. The costs for this are considerable, a specialist company will quickly charge 300 euros for a staircase, but if you have a house for sale, it is a good investment.

Glue profile
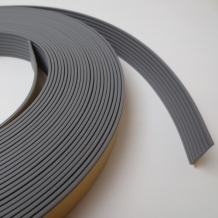
A disadvantage of a milling profile is that a groove has to be made in your stair step. Something you usually can't do yourself, but you have to have it done. You need special tools for this. Watch a video on you tube and see if you can do this job yourself. You should also consider that if you live in a rented house, this is often not allowed by the owner or the housing association, I would inquire about this first, because if you move you will otherwise incur considerable costs to restore it. For houses in a rental situation, or if you do not want to spend too much money, there is an adhesive profile for stairs. The adhesive profile is a flat strip made of special plastic and is supplied on a roll, which has a very strong adhesive layer on the underside. The flat strip is glued to the stair step and is also approximately 2 mm thick and provided with grooves for good anti-slip. You cannot compare this product with a non-slip tape. The differences in this are large, first of all the composition of the material, the tape has a sandpaper top layer, and is very thin, like the thickness of a duck tape-like adhesive tape. So very sensitive to wear. If you want to know more about the types of anti-slip tape, you can read all about it here, with prices and comparisons.
The great thing about this flat strip is that you don't have to be super handy to apply it. You can let the strip continue into the corners of the steps. If you are moving house, remove the flat strip by heating the strip with a hair dryer. This is quite easy without causing damage to the stairs.

Frequently read blog articles:
- Painting your stairs as a renovating project
- Create an industrial look for your stairs
- Paint your stairs in a concrete look
Blogwriter: John


Comments
Login to give reaction Your comment will be posted as soon as it is approved.